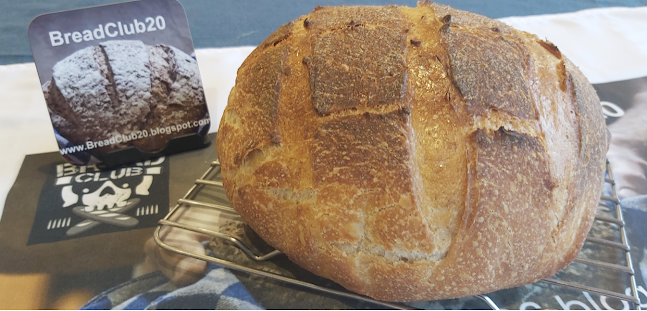
Easy Overnight Sourdough
My sourdough regime tends to follow the same pattern. The day before Bread Day I prepare my starter. On Bread Day morning, I mix starter, flour, water and salt together and knead into a dough.
Then the waiting begins. The timer is set for 3 hours. I go off to do other things: have breakfast, read The Guardian, annoy people on Facebook.....
After two hours have passed, I stretch and turn the dough and leave it for a further hour. Just enough time for a cup of coffee and a shower.
Then I transfer the dough into bannetons and set the timer for another three hours. By now it's lunch time. If I have time, I might try and achieve something in the afternoon.
Finally, it's time to heat up the oven and bake the loaf.
It's all very time-consuming - even if it is more than worth it in the end.
So, for the past few days, I've been experimenting with a slightly different approach. I've called it my 'Easy Overnight Sourdough'.
The advantage is that the brief mixing takes place in the morning or in the afternoon, you then leave it overnight and bake the following morning. Whichever suits you the best. At least you're asleep during the waiting time.
You still need an active starter, so there is some forethought and preparation needed to make sure you have a decent bubbly starter.
INGREDIENTS
150 gms active starter
285 mls tepid water (you may need to add up to a further 15 mls of water if the dough feels too dry)
500 gms strong white bread flour
9 gms sea salt.
A cast iron casserole pot / aluminium roaster / enamel casserole pot - WITH LID
And that's it.
Now, you'll notice that the process is slightly different.
METHOD
DAY ONE
Either.......
Late afternoon mix for a morning bake the following day.
- Add all the ingredients into a large enough bowl. Using your hand, bring all the ingredients together and mix for only about one minute.
- Cover the bowl with cling film and let it rest on the worktop for half an hour.
- Stretch and fold the mix in the bowl for about a minute. Again, you won't need to spend much more than a minute stretching and folding.
- Cover the bowl with cling film and leave out on the worktop overnight.
- In the morning it will have doubled in size.
Early morning mix for a morning bake the following day.
- Add all the ingredients into a large enough bowl. Using your hand, bring all the ingredients together and mix for only about one minute.
- Cover the bowl with cling film and let it rest on the worktop for half an hour.
- Stretch and fold the mix in the bowl for about a minute. Again, you won't need to spend much more than a minute stretching and folding.
- Cover the bowl with cling film and leave out on the worktop for 8 hours.
- Pop it into the fridge overnight and bring it out to 'warm up' for an hour or so before you form it and the put the oven on to heat up.
 |
| Leave the mix for 30 minutes (No. 2 above), stretch and fold and then place on the worktop for 8 hours. If you're done this early in the day, refrigerate until morning. |
DAY TWO
 |
| Whether it's been in the fridge or out on the worktop - it should have doubled in size and now be ready for forming and baking. |
- Preheat the oven to 240 degrees C (or as near as you can get to this).
- Put the lightly oiled casserole / dutch oven / roaster in the oven to heat through. (However, you can also add the dough to a cold dish - it's just that it develops a better colour if the pot is hot). There's no need to preheat the lid.
- Gently scrape the dough out onto a floured board or counter. Don't knock it back - we need to keep the hidden air bubbles.
- Bring the outside thirds into the middle. Do this tightly to try and retain the tension of the dough. Shape into a ball.
- Place the dough on a sheet of parchment paper
- Cover with oiled cling film and allow to rest for 30 minutes. Set a timer for this - DO NOT EXCEED 30 MINUTES.
- Remove the cling film and slash the dough with a blade.
- Remove the hot pot from the oven, pick up the parchment paper and carefully place the dough on the paper into the pot.
- Put the lid on and return to the oven.
- Reduce the heat to 220 degrees C and bake for 20 minutes. Then remove the lid and bake for an additional 20 - 25 minutes.
- Remove from the pot and allow to cool on a rack until cold.
 |
| After the dough has been stretched and turned, made into a boule and covered with oiled cling flim, it's allowed to rest of 30 minutes while the oven comes to temperature. |
The bread freezes fabulously.


Comments
Post a Comment