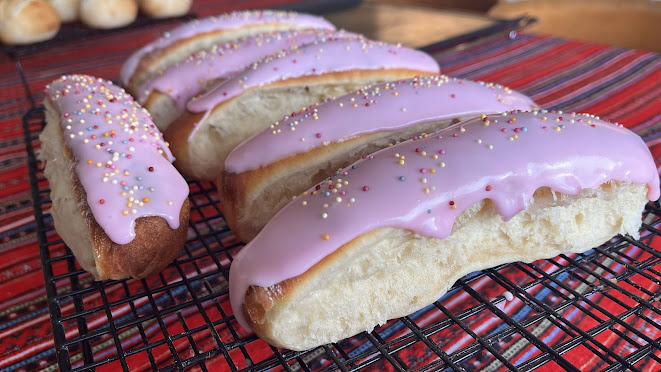
Lancashire Iced Buns
Welcome to another step-by-step recipe from BreadClub20. Why not drop by our main Facebook page by clicking here.... If you like what you see and enjoy the recipe, we hope you join us by 'Liking' and 'Subscribing'
I was brought up in Lancashire, where we knew these as 'School Buns' or 'Penny Fingers' or 'Iced Buns'. They were bought as a treat from the bakers on the way home after a gruelling day at school.
I also remember them being baked in school...giving even more credence to their name. They were baked by the school dinner staff and served as a dessert (or 'pudding' as we called it).
They come in a whole host of varieties:
- long thin fingers or more 'sub' shaped
- split and filled with jam and cream
- split and simply filled with jam
- iced with white or pink icing
- sometimes containing just a very few currants
- sometimes round with a glace cherry on the top
INGREDIENTS (for TWELVE fingers.....I halved the recipe for the purposes of this step-by-step)_
500 gms strong bread flour
50 gms caster sugar
50 gms unsalted butter
200 gms warm milk
2 eggs
4 gms crushed sea salt
10 gms dried yeast or 7 gms of instant active yeast (either way, activate both with some of the milk and sugar before starting)
for the glaze topping use a thick paste of icing sugar and water (with colouring if so wished)
(300 gms of icing sugar and 50 - 70 gms cold water)
METHOD
After you have activated the yeast, add all the ingredients to a large bowl and mix thoroughly.
Knead until you have a soft and silky dough.
Place the dough in a lightly oiled bowl, cover and leave to double in volume.
Once doubled, tip out onto a lightly floured board, de-gas (knockback), weigh the dough and divide into 12 pieces.
Roll out the pieces into balls and leave them covered, for ten minutes.
Then, gently, roll the balls into oval 'fingers' - about 4 inches long. If your dough is strong and light and the proof goes well, you'l have to work the dough to achieve shop 'fingers'.
Place on a baking tray. Traditionally, the fingers could be placed quite close together and allowed to touch during proofing so that there is a soft side after baking. It's not necessary but it might save oven space.
Place in a warm spot and allow to double - this will take a little while due to the richness of the dough. Watch the dough, not the clock.
After second proof
Preheat the oven to 200⁰C and bake until golden.
Allow to cool before icing.
The icing paste should be applied either by dipping the finger bun into the icing (smoothing off the excess) or by using a palette knife to ensure a nice smooth and fairly even coating along the length of the finger bun.
TIP: keep your icing glossy by drying it with a cool hairdryer....no need for corn syrup or any other additive...simply put the hairdryer on 'cold' and let it blow over the icing. The quicker the icing dries, the glossier it will stay.
Happy baking...


Comments
Post a Comment