Jim Lahey's No-knead Artisan Bread

2021 : World Bread Awards : Winner - Wales
Welcome to another step-by-step recipe from BreadClub20. Why not drop by our main Facebook page by clicking here.... If you like what you see and enjoy the recipe, we hope you go on to join us by 'Liking' and 'Subscribing'.
I first made Jim Lahey's No-knead Artisan Bread a couple of years ago, and, to be honest, I wasn't happy with the outcome. I've had a long think, a bit of a scribble and I'm replacing the original step-by-step guide on BreadClub20 with the benefit of hindsight and contemplation.
Or perhaps, I just really screwed up the last time and want to make amends.....
Jim Lahey is the owner of Sullivan Street Bakery (https://www.sullivanstreetbakery.com/) with branches in Hell's Kitchen, Soho (US), Chelsea (US) and Miami. The 'No-Knead' recipe was created to help home bakers produce bakery-standard artisan bread from their own kitchens.
Lauded by the press and the trade magazines, it was claimed that the no-knead approach 'revolutionised the way people could bake'.
In the determination to get it right, this time, let's go:
INGREDIENTS
400 gms strong white bread flour
300 gms filtered tepid water
8 gms sea salt (crushed)
1 gm instant active yeast
Yes, really...only 1 gm of yeast...it'll slowly do its work over a long period...providing it's fresh of course.
METHOD
1. Stir the flour and salt together in a large bowl.
2. Add the yeast and stir again.
3. Add the water and combine together into a sticky mix. It shouldn't take more than 30 seconds.
4. Cover and leave to rest at about 20⁰C - 22⁰C for at least 12 hours and preferably 18 hours. If your kitchen is cooler, allow extra time.
As a guide, my kitchen is 19⁰C - 20⁰C and it's now 11.30 a.m. During the night, the room temperature will drop to 18⁰C. My mix will remain on the kitchen worktop until about 8 a.m. tomorrow morning. 20+ hrs.
The long, slow fermentation will help to develop flavour. Look for tell-tale fermentation bubbles on the surface.

5. Liberally flour the worktop. Turn the dough out onto the flour. the dough will be sticky and loose.
6. Using the floured underneath, turn the underneath into the dough to seal the sticky top. Folding the dough over itself like this will seal the dough. Don't knead the dough at all. Form a boule.

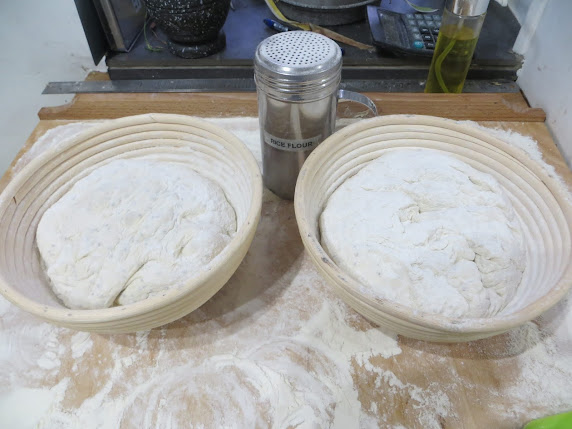
8. Watch the dough...not the clock. The dough is ready when you can make an indent in it that springs back slowly. If it springs back quickly...leave it a little longer.
9. When you think you're 30 minutes off being ready, pre-heat the oven and a Dutch Oven or lidded baking container to 230⁰C.

10. When you're ready to bake, tip the dough into the pot upside down, so the seam is on the top. This will ensure the dough expands nicely during oven spring. There is no requirement to score the dough - after all, the seam is at the top...there's plenty of crannies and gullies for the bread to use as it expands.

11. Mist the pot and the dough and again, just before replacing the lid.
12. Bake for 30 minutes.
13. Remove the lid and continue to bake for 15 - 30 more minutes until the loaf is chestnut brown.
14. Remove from the pot, allow to cool on a rack for an hour before cutting.


Happy baking...


Comments
Post a Comment