Welcome to another step-by-step recipe from BreadClub20. Why not drop by our main Facebook page by clicking here.... If you like what you see and enjoy the recipe, we hope you join us by 'Liking' and 'Subscribing'.
How easy can an easy sourdough be?
How little kneading does a no-knead sourdough loaf require?
Can we combine 'easy' with 'no-knead' and create same-day sourdough with great taste and texture.
The answer is 'yes!'
Here it is.
FORMULA
400 gms strong white bread flour (with a % protein of at least 12.5%)
132 gms fresh and active starter (fed 1:1:1 and at its peak)
261 gms tepid water
10 gms salt.
So what's that in Baker's Percentages?
How is this different to 'usual' sourdough?
1. There is considerably more levain here as it has a lot of work to do quickly. We require the starter to have already built up a certain amount of gluten before it meets the flour and water.
2. Salt is more or less what you'd expect - you can adjust this if you wish. Personally, it's there for taste.
3. The loaf is at 70.2% hydration.
4. The flour is a strong bread flour - necessary to help contain, control and develop a decent gluten network.
PROCESS
1. In a large bowl, dissolve the starter and the salt together in the tepid water. Mix well.
2. Add the flour and bring it together until you have a sticky clump. Make sure all the flour has come into contact with the water mixture. There is no need to knead.
3. Cover the bowl and leave at room temperature (between 20⁰C - 25⁰C) for two hours.
4. Tip the dough out onto a non-floured worktop. Do not add any further flour. If you feel it absolutely necessary, you can mist the surface of the board and your hands to make handling the dough slightly easier. It's a sticky mess, even at that stage, but persevere.
Fold the dough into a neat parcel and then gently move it around the board for a few moments using the palms of your hands or a bench scraper to create tension and help to develop gluten.
5. Return the dough to the bowl, cover and leave to bulk ferment at room temperature for 4 or 5 hours.
If you wish you can transfer the dough to your usual bulk fermenting vessel
6. Allow the dough to increase in volume to an approximate 90% increase.
7. Gently remove the dough onto a non-floured board. Do not add any extra flour. If you wish you can sprinkle down a little rice flour to stop the dough from sticking. You might also wish to flour your hands.
Fold in the sides of the dough and preshape into a boule. Cover with a cloth and leave for five minutes.
8. Prepare a banneton.
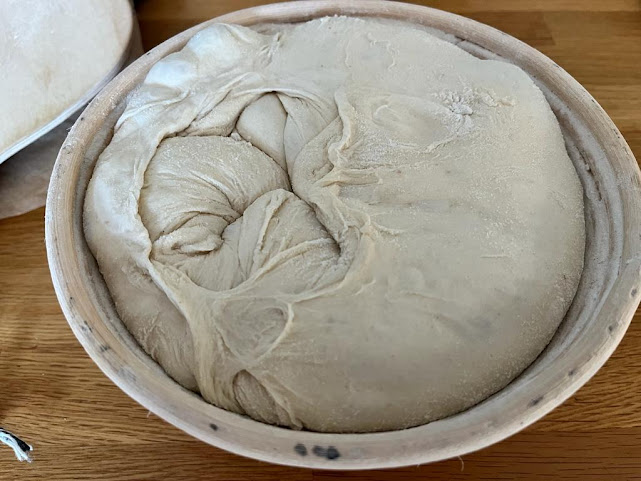
I'm using an 8-inch round banneton. I think it's easier to build surface tension on a boule - easier than working with a batard..but that's a purely personal view. If you want to make this into a batard..that's fine.
9. Shape the dough to fit the banneton. Dust the dough with rice flour and gently move the dough around the board to maximise surface tension. Cover and proof at room temperature for 2 hours.
If you wish, you can cold-proof overnight in a refrigerator instead of this shorter second proof at room temperature.
10. Preheat the oven to 240⁰C.
You may wish to place the dough into the freezer for 20 minutes before baking to make for easier handling and scoring
11. Transfer the dough to a piece of parchment paper and place it in the oven, covering it with a cloche or adding a bowl of water to create steam.
12. Bake for 20 minutes. Then, remove the cloche and/or the water. Reduce the temperature to 220⁰C.
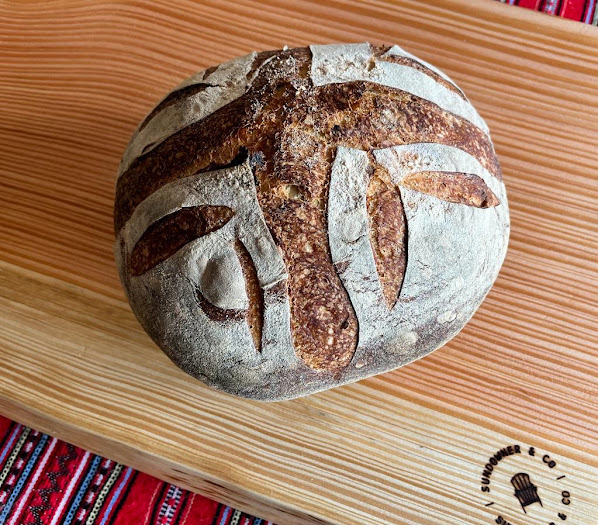
13. Bake for a further 20 minutes until golden and hollow when tapped on the underneath.
14. Cool on a rack for at least 2 hours.
Happy baking.


.jpeg)


Comments
Post a Comment