Scottish Morning Rolls
Welcome to another step-by-step recipe from BreadClub20. Why not drop by our main Facebook page by clicking here.... If you like what you see and enjoy the recipe, we hope you go on to join us by 'Liking' and 'Subscribing'.
Firstly, a confession. I'm not Scottish. However, many bakers asked me if I would write a step-by-step guide for Scottish Morning Rolls.
Phew! That's quite an ask as the Scottish Morning Roll is quite an institution.
There are some big players in the commercial production of the Scottish Morning Roll: McGhee's, Morton's and McMillan's to name but three.
However, they all have the same ingredients in common...so, it was a matter of reading numerous accounts of their consistency, colour, crust and crumb and experimenting to find a formula that came close to what I suspect is a country's favourite.
There are some basic ground rules:
1. Ideally, they should be consumed in the morning
2. They should be batch-baked, that is to say, the rolls should 'kiss' in the oven so you have a soft side to each roll.
3. The Glasgow roll version is almost oven-charred. They refer to it as 'well-fired'.
4. They should be light, airy and crispy. Glasgow rolls are made even crispier by coating them in a mixture of rice and plain flour before baking.
5. They range from uniformly shaped to something bordering on chaotic.
6. Like French bread, they don't keep; however, they can be frozen quite successfully. They are best eaten as hot-filled rolls: bacon, sausage (preferably square slices of sausage meat), black pudding, and add a fried egg, and it becomes "a doubler".
So, how do they commercially make Scottish Morning Rolls every day and develop consistency in terms of shape, taste and rise?
The answer is IREX Voltex - a commercial dough improver that helps develop a light and airy crumb. Dough improvers are a form of or an alternative to E472, helping to enhance the gluten mesh and stabilise dough where there is a richness of fats. It extends shelf life, increases volume and delivers softness.
Sounds too good to be true. Well, use it if you will or if you must. It doesn't fit comfortably with my artisan home-baking principles. I'll bake enough to eat before they go stale.
So, here goes...after reading and trialling, I've come up with this....
INGREDIENTS
500 gms strong white bread flour - ideally, high protein (14%) Canadian flour
30 gms vegetable shortening (e.g. Trex, Crisco) or lard
10 gms caster sugar
10 gms salt
385 gms cold water
5 gms fast action yeast
For the coating
40 gms rice flour
40 gms plain flour
METHOD
The evening before
1. Crumble the shortening/lard into the flour.
2. Add the sugar, salt and yeast
3. Add the water. This is a wet dough. If your flour is strong enough it will take the full 385 gms of water. It is a sticky dough.
4. Knead briefly just until the dough starts to be formed and becomes smooth.

5. Place in a bowl, cover with cling film and place in the refrigerator for 12 - 16 hours.
Next morning
6. Mix the rice flour and the plain flour

7. Liberally dust a worktop with the flour/rice flour mixture and tip out the dough.
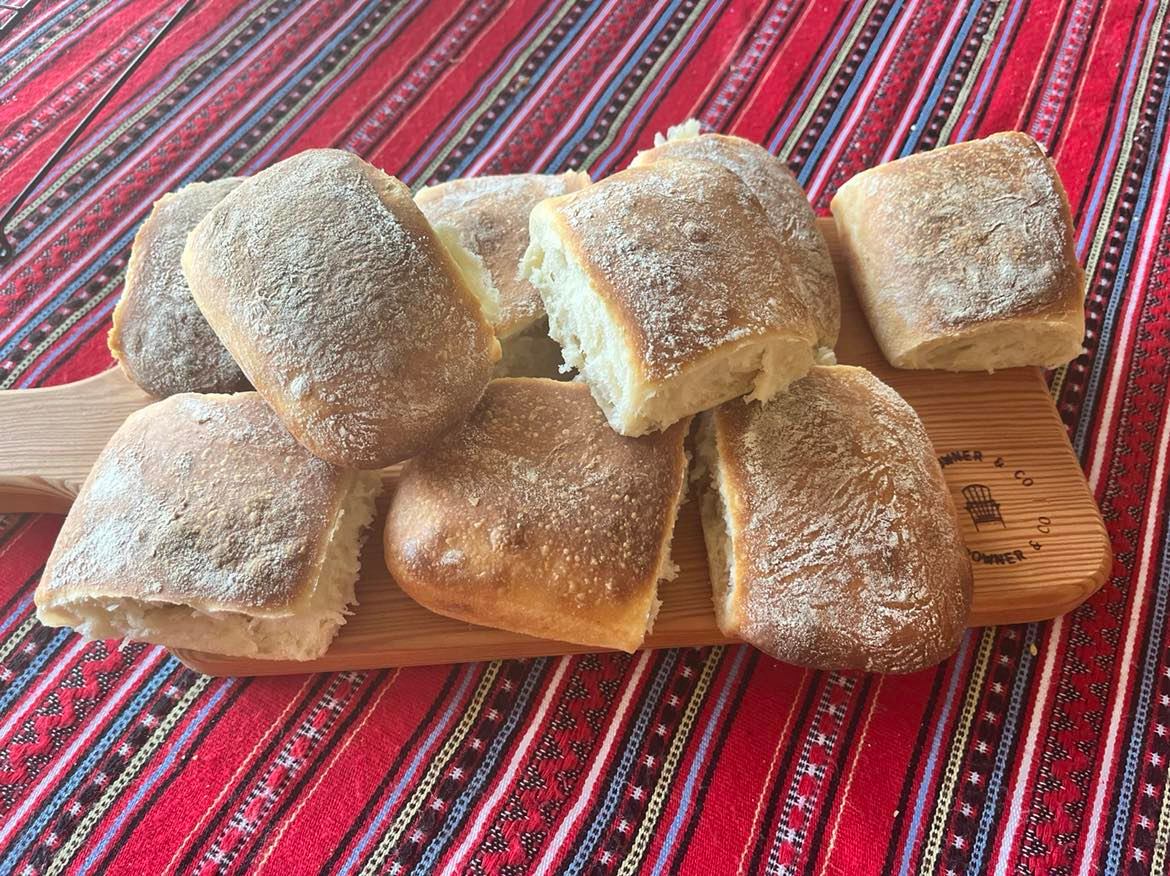
8. Divide the dough into nine pieces. Shape into balls and then roll them in the rice/flour mixture. This is quite a sticky dough, but the plain/rice flour mixture helps considerably.
.jpg)
9. Place them on a prepared baking tray and flatten down the tops gently...they will rise again during the second proofing.

10. Place them so that they almost touch on each side. Cover and leave to proof at room temperature for 1 - 2 hours until doubled in size.
.jpg)
11. Preheat the oven to 240⁰C and bake for 15 - 20 minutes until well-baked and crispy.
12. Cool and serve.
Happy baking....


Comments
Post a Comment