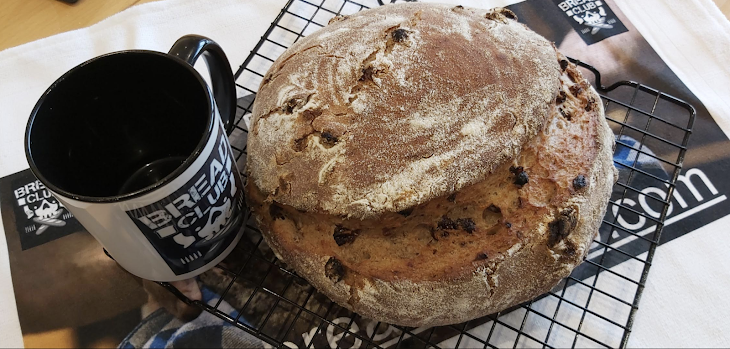
Rye and Raisin Bread
Welcome to another step-by-step recipe from BreadClub20. Why not drop by our main Facebook page by clicking here.... If you like what you see and enjoy the recipe, we hope you go on to join us by 'Liking' and 'Subscribing'.
Rye is closely related to wheat and barley and, in its earliest domesticated form, it's been tracked back to Neolithic times.
When made into flour, rye grain produces a denser bread than that made with wheat. It's higher in fibre and in its two forms, 'dark' (whole grain) and 'light' (processed to remove the outer seed coat, the bran and the germ), produces a bread that is darker in colour and stronger in taste.
Rye bread was considered a staple throughout Europe as far back as the Middle Ages. Today, pure rye bread is popular in Germany, where it's known as pumpernickel and Jewish rye bread, sissel or cissel bread, to which caraway seeds are added, is popular in America. Both are dense, dark breads and something of an acquired taste.
This recipe produces a large loaf. Whilst it contains dark, wholemeal rye flour, it is tempered through the addition of strong white flour. This helps to lighten the bake, both in colour and in texture.
Rye flour isn't hard to buy, these days. Large supermarkets will probably sell 'light' rye flour and also 'wholemeal' rye flour. We're using the wholemeal version. It's grey and you should still be able to see flecks of the whole grain running through it.
Like all fruit bread, this is ideal toasted. However, my favourite accompaniment is a good strong English cheese. Mature cheddar is ideal. Fruit bread and cheese is a marriage made in Heaven.
INGREDIENTS
150 gms of raisins (pre-soaked in Earl Grey, Lady Grey, sherry....whatever takes your fancy)
200 gms whole grain (dark) rye flour
300 gms strong white bread flour
340 mls of filtered or basic still bottled water, brought up to room temperature
10 gms sea salt
7 gms instant fast-action yeast
This is a hand-mixed recipe. Consequently, there are no instructions for machine users. But, there comes a time in every bread baker's journey when you have to roll your sleeves up, strap on the apron and make a mess in the kitchen. This is your time....go for it.
METHOD
I use a Dutch whisk. If you don't have one, use a wooden spoon or, better still a pair of clean hands - preferably your own.
Stage 1
 |
| Ready to start |
- Mix together the rye and the white flours in a large mixing bowl.
- Mix in the salt
- Mix in the yeast.
- Drain the raisins and add these. Mix thoroughly.
- Slowly incorporate the water until you have a wet, sticky dough.
- Cover the bowl with cling film, a shower cap or a tea towel. I always use shower caps - they're superb at keeping your dough moist.
- Leave for 30 minutes.
 |
| After kneading |
- Dump all the dough onto a very lightly-floured board or worktop.
- Knead the dough for about ten minutes. There's a guide to how to knead here: https://www.youtube.com/watch?v=ySOj0fFWo1U
- You should now have a soft, silky and pliable dough.
- Return the dough to the mixing bowl and recover. Let it rest somewhere warm for about 1½ hours. (at 20⁰C or thereabouts, it should probably take an hour - a kitchen worktop is fine)
- By now it will have doubled in size.
 |
| After 90 minutes |
- Gently turn the dough out onto your lightly-floured board or worktop.
- After a gentle stretch and fold (4 or 5 times) , you'll feel the dough tightening up. Decide whether you want two small loaves or one large loaf. Divide the dough as you wish.
- Shape the dough into a boule.
- Place the boule away from you at the end of the worktop and cut your hands round the far side. Gently draw the boule towards you. This will create tension on the surface of the dough and help to stablise it. If you want to see how to create tension in this way, there's a very good video here: https://www.youtube.com/watch?v=ww78_SfGyQE
- Generously flour a proving basket or banneton or generously flour a board.
- If you're making an oval loaf, shape the boule into an oval, dust with flour, and place into the proving basket or onto the board. If you are retaining the boule shape, lightly dust the boule with flour and place it on the board or into the banneton.
- Cover with a piece of parchment paper and leave on the kitchen worktop for a further hour or until it has doubled in size. Remember to preheat your oven about 15 minutes before you intend to bake.
- Preheat your oven to 230⁰C and place a rack in the lower third of your oven. If you're using a baking stone or pizza stone, remember to heat these up from cold. If you're using a baking sheet, flour the sheet in advance but it's not necessary to preheat it.
- When the oven is up to temperature, turn the dough out carefully onto either a baking sheet or onto a baker's peel if you're transferring it to a baking / pizza stone or sheet of cordierite.
- Score the dough as desired. It's not a particularly firm dough so, if you're like me, the scoring won't be a thing of beauty!
- Mist with water and bake for 35 minutes at 220⁰C.
- Remove when the loaf is a golden to dark brown and cool on a wire rack.
 |
| And finally.... |


Comments
Post a Comment