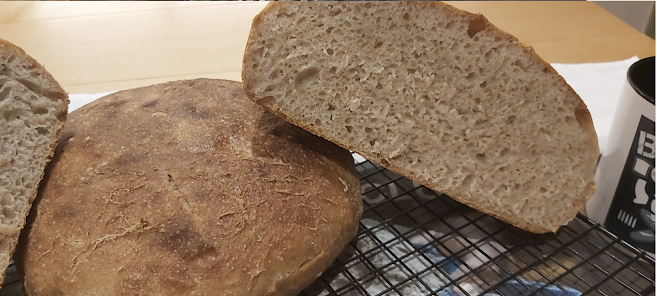
Pain de Campagne (i)
This is the first of TWO blogs on Pain de Campagne. This first blog is a little trickier than the second. It's a wetter and more loose dough with a higher hydration. It might not suit inexperienced sourdough bakers. If you'd prefer a slightly easier recipe, go to https://breadclub20.blogspot.com/2021/01/pain-de-campagne-ii.html
The trick is to prepare this dough for cooking in a container, for example in a cast iron casserole or Dutch Oven. You will also find proving it easier if you line your banneton with parchment paper to prevent sticking.
Anyway - enough of the negativity - let's get on with it.
Pain de campagne, or 'country bread' is also known as French sourdough.
Traditionally it is a miche - a large loaf of country bread. Whilst it was a sourdough, it was also a blend of flours, for example, rye, wheat or barley; producing a hardy loaf that would feed a large family.
The miche incorporated either natural leavening or was supplemented by baker's yeast. It would be carried to the communal village ovens where it might weigh anything between 1.5 kg and 4.5 kg. - so providing enough bread for a family until the next baking day.
The loaf contained rye as well as wheat flours mainly because the two crops were often grown together. Roughly 10% of wheat flour would be rye and this eventually found its way into recipes.
As with many rural French breads, the pain de campagne fell out of favour at the start of the 20th century in favour of the baguette. It wasn't until the rise of the artisan bakers in the 1970s that the pain de camapgne once again found its way into the boulangerie and onto bakers' shelves across Europe and in the United States.
Traditionally, the natural yeasts are allowed time to develop and the use of a sourdough starter is ideal for this. In addition, the loaf is proven in wicker bannetons to produce the boule de campagne or miche de campagne....or even the pain de campagne!
Of course, as well as producing it in a round banneton, you can also form and prove it using an oval wicker banneton, loaf tins or even a Dutch oven. You can also divide the dough into smaller portions and bake smaller loaves. Or, double up for a mass bake. As ever, the choice is yours.
INGREDIENTS
737 gms strong white bread flour
57 gms wholemeal and rye flour (mixed 50:50)
650 mls warm water (33 degrees C)
1 teaspoon sea salt
354 mls active sourdough starter
½ teaspoon of commercial fast action yeast
Optional : 7 gms aramanth (this is a high protein grain that is often added to authentic French pain de campagne. It's purely optional. You can buy it from health food shops or from Amazon)
If you want to scale up or down to increase or decrease your quantities, you'll find a useful tool here: http://brdclc.com/?flour=1000&water=75&salt=2&leaven=20
METHOD
If you're using a machine, add the flour to the pan and cover with the liquid. Stir. Leave to autolyse (just leave it alone) for 30 minutes. Add the yeast, starter and salt (keep the salt away from the yeast) and choose a rapid dough programme - e.g. a pizza setting (45 minutes). Then proceed to the next stage.
If you're mixing by hand or using a stand mixer, add the water to the flour and the yeast and mix thoroughly. Leave for 30 minutes to autolyse. Then add the starter and the salt. Then mix thoroughly Turn the mix out onto an oiled board and knead until you have a silky and pliable dough. (There are 'Help' videos and articles in the 'Useful Web and YouTube links' on the left hand side of this page). Let it rest for 15 minutes.
This is quite a wet mix. You may need to add a little more flour to bring it all together. On the hydration scale it's coming in at 82%. You may want to add a few grams of flour to bring it at or below the 80% mark. There's a useful guide at https://www.craftybaking.com/howto/hydration-bread-dough#:~:text=To%20calculate%20the%20hydration%20level,multiply%20the%20result%20by%20100.
Place the dough in an oiled bowl, cover with cling film and put in a warm place for 6 hours.
At the two and four hour markers, tip the dough out onto an oiled board and gently stretch, fold and turn until you feel the dough tightening up. It's quite difficult with a wet mix, so don't worry if you feel you haven't done it justice. Return to the bowl and the warm place until the next time. After the second round of stretching and folding, leave it at least another two hours until the dough has doubled in volume.
Place the dough on a well-floured board and cut into two equal pieces.
Gently form the dough into something resembling a boule and place in a banneton, proving bowl or cast iron casserole dish that has been lined with parchment paper.
Cover the proving bowls / containers with parchment paper and leave in a warm place for TWO hours or until it has risen to twice its original volume.
Because it is such a wet mix, I've decided to put the dough into a cold dutch oven on parchment paper. This means that I won't be able to preheat the dish, but at least the dough will rise within the pot and run less risk of being even more difficult to handle.
Preheat your oven to 240 degrees C.
Place the dough into the Dutch oven or onto the baking stone on a low shelf and turn the heat down to 230 degrees C.
Bake for approxinately 40 minutes until golden to dark brown.
If you're using a Dutch oven or cast iron casserole, keep the lid on for 15 minutes and then remove it for the remainder of the cooking time.
Cool on a rack.
Happy baking....


Comments
Post a Comment