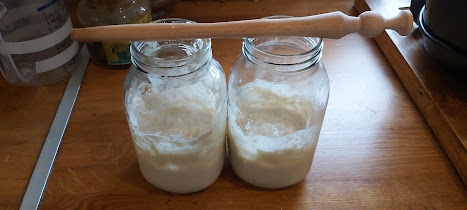
Wednesday is usually Sourdough Day....
Last night my sourdough starter was taken out of the fridge and reactivated. To each of the two 100gms of starter I added 100 ml of cool water and 100 gm of Nestrop Empress strong white flour.
We're lucky in Wales. The water is very soft and is ideal for bread making. I've been buying my flour from Albion Mills in Stockport since this March when flour was in short supply. Nestrop's Empress is a great quality flour and at £1.06 a kilo (www.amazon.co.uk) it's a good buy.
I've been using Patrick Ryan's technique since I started making sourdough and my 'starter' just keeps getting better and better. The longer you keep it and the more you use it then the better it gets. I tend to use a low hydration mix as I find a high hydration gives me too much of the acetic acid 'vinegar' taste. I might sacrifice a few artisan 'holes' in the crumb, but, for me, the taste is far superior - and easier on the taste buds.
If you're new to sourdough then, to be honest, you can't go far wrong following Patrick Ryan's video course. There's a link to it on the left under 'Useful Links'. My starter took me seven days to prepare and now I have half of it in the freezer - just in case of a disaster - and half of it (100 gms) in the fridge sitting quietly until the day before I bake. Then, I divide it into two, add water and flour and give them both a quick stir with the spirtle (see the image above) and they start doing their magic ready for the morning.
Wednesday.
OK - a confession. I stopped mixing and initial kneading by hand years ago. It's a case of 'why buy a dog and bark yourself?' I've got a Dutch whisk and a pair of hands but it's just too much a labour to do something by hand when a machine can make a far better job of it.
So, many years ago, I purchased two Panasonic SD 2500 model bread machines (£99.99 each from Amazon). I don't think I've baked in them more than once or twice, but as dough mixers, they are incredible. They have limitless patience and just the right 'touch'. I can't believe professional artisan bakers who bake in batches bigger than single loaves can be bothered to do it by hand when dough mixers are as good as they are. I'd never buy any other brand other than Panasonic. I've wore two machines out and I'm currently on my third and fourth machines but the old ones didn't owe me a penny.
Sourdough Phase 1 (Tuesday night)
Prepare your starter the night before....make sure you have at least 260 gms of starter. 160gms is for the mix...the remaining 100 gms goes back into the fridge ready for next week.
Sourdough Phase 2 (Wednesday morning)
It's a half-mix today (if you want a double mix - 4 loaves, simply double the ingredients).
160 gms of sourdough starter
400 gms of strong white flour
5 gms of sea salt (the best you can buy) - 5 gms is a teaspoonful.
230 ml of cool water.
Everything goes into the machine. Many machines are not complicated things. I choose a short dough programme - Panasonic identifies it as 'Pizza' setting and it's a 45 minute programme. Switch on and go and do something useful. The skill of the machine is in creating 'texture' in the first mix and in kneading. I'll take over after that.
(If you're mixing and kneading by hand - it'll take a good 20 minutes to reach the consistency you want. It should be elastic and smooth and, if you hold it up to the light, you should be able to pull it and see through it without it tearing)
Then...leave it alone for three hours.
Sourdough Phase 3


Comments
Post a Comment