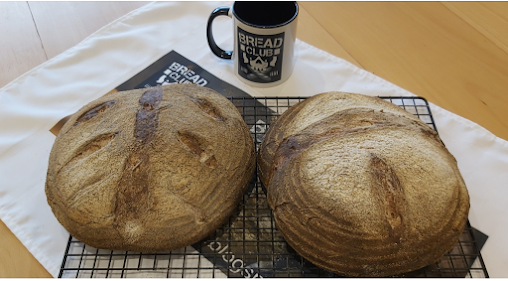
Sourdough - an overnight bake!
Sometimes, one way to make sourdough...is slowly.
This week's recipe is straightforward enough - it just takes time and requires a little space in your refrigerator.
Because the work is minimal and there is very little interference with the dough while it's working its magic, the 'holes' that make sourdough distinctive tend to be on the small side. However, the taste is everybit as good as any other sourdough.
Allow two days for this process. You'll have to be around most of both days - although you will have very little to do. An ideal task for wet days, while you're waiting in for Amazon or for during a pandemic!
The magic begins with a very active pre-ferment or starter.
If you're new to the sourdough magic and you want to make a sourdough starter - you'll find a recipe in the 'Your Guide to the Recipes' on the left hand side of this page.
Let's start with the ingredients:
100 gms of starter
250 mls of water
394 gms of strong white bread flour
8 gms of sea salt
You'll also need 2 x 10 inch bannetons for the second and final prove or something similar in which you can prove the dough before free-forming it onto a baking sheet.
And you'll also need some coarse flour to dust the dough and the bannetons or proving containers. Use spelt or rye or rice flour.
DAY ONE
STEP ONE
Hand mixing
Mix all the ingredients together until you have them blended into a sticky dough. Cover with parchment paper and leave in a warm place (22 - 24 degrees C) for FOUR HOURS
Machine mixing
Place all the ingredients into the pan and choose a short dough programme (I use the Pizza 45 minute setting and turn the machine off after 30 minutes). Take the dough and place in a lightly-oiled bowl and place somewhere warm (22 - 24 degrees C) for FOUR HOURS.
STEP TWO
At the end of the four hours, place the dough on an oiled board and fold the dough over itself three or four times. Put it back into the bowl and return it to its warm place for a further TWO HOURS
STEP THREE
Dust your bannetons or bread former heavily with coarse flour.
Scrape the dough onto a floured board and shape into a ball. Use just enough flour to stop it sticking.
Bring all the 'scruffy' edges together to form the bottom, so that the top is smooth and tidy. This 'top' will, of course go into the banneton first, so becoming the bottom for the second prove but will be the top again when the bread is put in the oven to be baked.
Cover and place in the refrigerator for TWELVE HOURS to slow down the fermentation process.
DAY TWO
STEP FOUR
A warm spot will be about 22 - 24 degrees C and you're looking for the dough having risen and, when a finger is pressed gently against the dough, it springs back leaving a slight indentation.
If you have a pizza stone or a cordierite stone, place these onto a low rack in a COLD oven.
Preheat your oven to 230 degrees C.
If you don't have a suitable stone, line a baking tray with parchment paper.
Either
Tip the loaf onto your baking tray (lined with parchment paper) and slash as desired to help the dough rise.
or
Carefully tip the loaf out of the banneton onto parchment paper, slash as desired and slide it into the hot oven.
Bake for about 40 - 50 minutes until the bread is the right colour and sounds hollow when tapped on the underneath.
Cool on a cooling rack.
Happy baking...


Comments
Post a Comment