Baking Bread in Bannetons
There's nothing better than being alliterative first thing in the morning.
I've a collection of bannetons: oval and round.
Oval: two sizes (length x width x depth - in cms) 30 x 15 x 7 and 22 x 13 x 6
Round : two sizes (diameter x depth - in cms) 20 x 8 and 20 x 10
I've accumulated about four of each so I have enough for single or double mixes.
Some come with 'mop caps' made of cotton or linen, but I use squares of cotton to line them and they work just as well.
A banneton is a proving basket made of a natural material, either cane or wicker.
The word derives from the Latin benna meaning a 'wicker carriage'. Banne appears in Norman and Lyonnais French with the same meaning. It's banna in old Norse and brotform in German.
There are some basic 'rules' when using bannetons:
1. Never wash them.
2. Only use the cotton liners when you are making bread that requires yeast. The structure of the bread is such that the dough resists sticking to well-floured liners. If you are making sourdough which requires the use of a fermentation, the structure is too loose to avoid adhesion to the liner.
3. Always flour the banneton and the dough. Be generous with the flour - the excess can always be reused. And always use a rough grain flour : spelt, rye flour, stoneground, rice flour, etc.
4. Never bake in a banneton - it is ONLY for the second proving stage.
5. Never use a plastic banneton. the whole point of the natural cane or wicker is to 'wick' away the moisture from the dough. Plastic will simply make it sweat. Likewise, never line the banneton in clingfilm.
Sourcing your banneton
I always buy mine from China. There are many importers in the UK who will charge you a king's ransom for bannetons. However, if you search Ebay, you'll find distributors in China and Taiwan that will send them (including postage) for a very reasonable sum. They also sell a heart-shaped banneton but I've never felt the need....
Typical prices (correct to October 2020) - including postage - measurements in cms
13 x 6 round £5.19
18 x 9 round £7.29
22 x 8.5 round £7.99
25 x 15 x 8 oval £8.54
30 x 14 x 7 oval £9.11
On receipt, I leave my banneton for 48 hours and then wipe it out with a slightly damp cloth using some sort of anti-bac solution. Leave it to dry and it's ready for use.
Remember, it's a container to help the proofing or proving of the dough. The terms proofing and proving seem to be interchangeable these days. I suspect proofing is American English. It's a very old word, anyway - linked to the idea of 'growth'. The yeast grows and expands the dough. The term was also used in early brewing for when the alcohol is increased by the action of the yeast.
Today, I'm making sourdough in bannetons.
I'm making my usual mix see https://breadclub20.blogspot.com/2020/10/wednesday-is-usually-sourdough-day.html.
From starter (45 minutes) to first prove (oiled bowl for 3 hrs) and then to second prove (Stage 3 in the recipe above)...and this is where I use the banneton.
An aside:
Developing tension in dough
People often ask why their dough spreads out rather than heads upwards when it's put in the oven while it benefits from 'oven-spring' (the way the dough rises when it first meets the heat of the oven)
The reason is that the dough lacks tension. It takes a bit of practise, but to develop tension:
1. Take the dough at first and second proving stage and knock it back, forming it into a ball.
2. With one hand hold down the edge of the dough nearest to you and pull the rest of the dough away from you with your other hand - as though you're stretching it.
3. Fold the dough furthest away from you back into the middle and turn the whole dough through 90 degrees.
4. Repeat the stretch, fold and turn process over and over again for about a minute. You're aggravating the gluten strands and helping to form tension in the dough (whatever sort of dough you're producing) - as well as helping to enable 'bubble holes' in the dough if you're making sourdough.
5. Form the dough back into a ball and move on to the first or second prove.
Right, back to the business in hand.
My sourdough has been mixed, stretched, folded and turned and then placed in a large, slightly olive-oiled bowl, covered with a tea towel and left in the airing cupboard (24 degrees C) for three hours.
The mix produced 780 gms of dough, divided equally between two well-floured bannetons. This time, I'm using Spelt fiour, an ancient whole grain which is coarsely ground.
Then, the bannetons go back into the airing cupboard (22 degrees C by now, but it doesn't matter) for a further two and a half hours.
Preheat the oven to 230 degrees C.
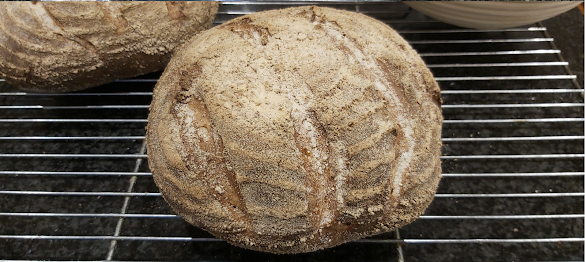
At the end of the two and a half hours, quickly invert the bannetons onto a baking tray band then remove the banneton basket from the dough. As you can see from the photo below, the dough picks up the attractive weave of the banneton.
Brush the dough over with a little coarse flour - today I'm using rice flour - and then score with a lame, a blade or a knife as desired.
Place the baking tray in the lower half of the oven for 25 - 35 minutes until the bread is done. Place it on a cooling rack. These are smaller sourdough loaves so they take less time to cook. Remember you can test them by tapping their bottoms. If there is a hollow sound.....they're ready.
 |


Comments
Post a Comment